Install
Two small steps and you are done. No config files to hand-edit unless you want to.
- Add the monkbrowse server to your AI client (one click or one command below).
- Install the Chrome extension and share a tab.
The server runs straight from npm with npx (or bunx / pnpm dlx), so there is nothing to download or build. Your AI client starts it automatically.
You do not need to read any source
End users never clone the repo. Pick your client below, click the button or paste the one line, install the extension, done.
1. Add monkbrowse to your AI client
Cursor

One click adds it. If the button does not open Cursor, go to Settings → MCP → Add new global MCP server and paste:
{ "command": "npx", "args": ["-y", "monkbrowse"] }VS Code

Or from a terminal (works with the code CLI):
code --add-mcp '{"name":"monkbrowse","command":"npx","args":["-y","monkbrowse"]}'Claude Code
One command, nothing else:
claude mcp add monkbrowse -- npx -y monkbrowseAdd --scope user to make it available in every project:
claude mcp add --scope user monkbrowse -- npx -y monkbrowseGemini CLI
gemini mcp add monkbrowse npx -y monkbrowseAdd -s user to install it for every project (~/.gemini/settings.json).
Codex CLI (OpenAI)
codex mcp add monkbrowse -- npx -y monkbrowseCursor CLI
The cursor-agent CLI uses the same config as the Cursor editor — there is no separate mcp add command. Use the one-click button above, or add monkbrowse to ~/.cursor/mcp.json:
{ "mcpServers": { "monkbrowse": { "command": "npx", "args": ["-y", "monkbrowse"] } } }Windsurf
Settings → Cascade → MCP servers → Add server, then paste:
{
  "mcpServers": {
    "monkbrowse": { "command": "npx", "args": ["-y", "monkbrowse"] }
  }
}Hit the refresh icon in the MCP panel and monkbrowse appears.
Claude Desktop
Settings → Developer → Edit Config, and add monkbrowse to mcpServers:
{
"mcpServers": {
"monkbrowse": { "command": "npx", "args": ["-y", "monkbrowse"] }
}
}Restart Claude Desktop. (This is the one client that still needs the config file today.)
Any other MCP client
Point it at this command. Every client understands it:
npx -y monkbrowsebunx monkbrowsepnpm dlx monkbrowse2. Install the Chrome extension
monkbrowse drives your real Chrome, so it needs a small extension in the browser. Install it from the Chrome Web Store in one click, and it auto-updates:

Then pin the monkbrowse icon so it is easy to reach.
Listing in review
The Chrome Web Store listing is submitted and under review. The button above goes live the moment it is approved.
3. Share a tab and go
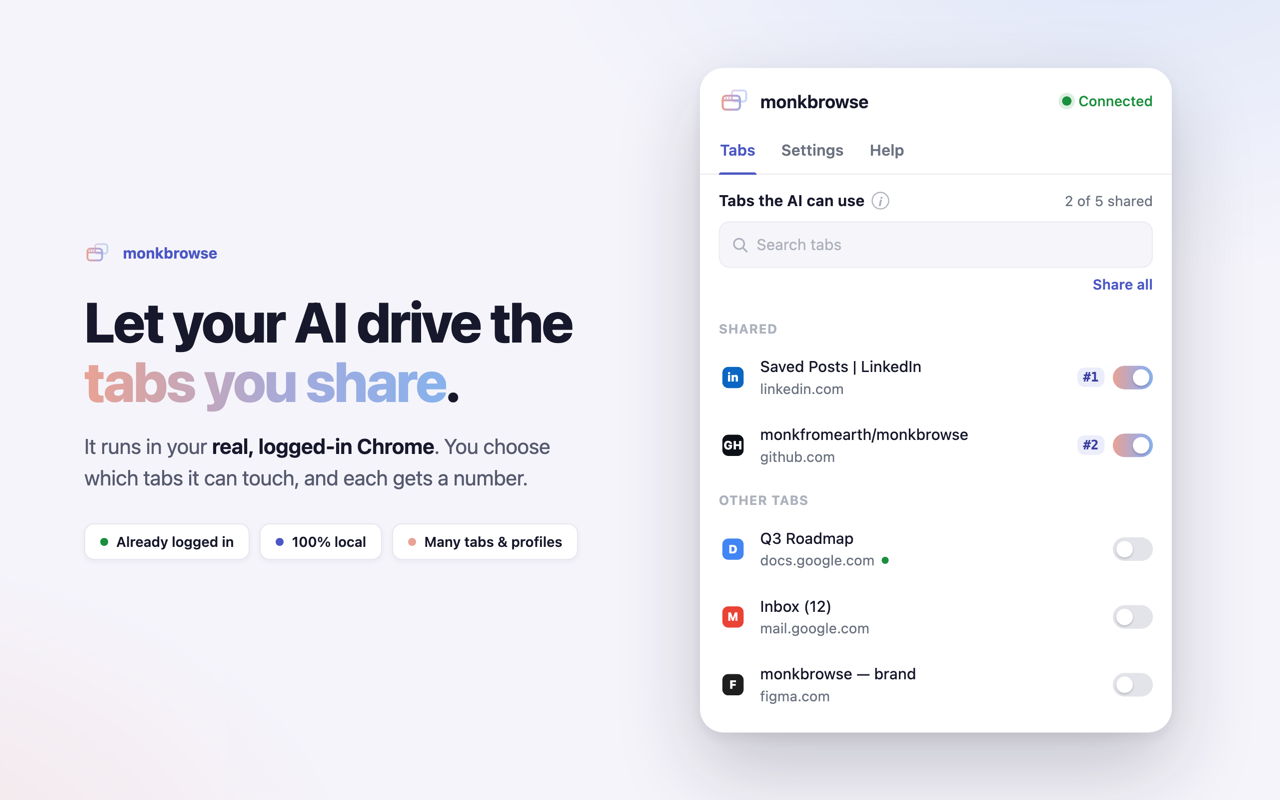
- Open the monkbrowse popup (the toolbar icon). The status dot turns green when your AI client is running.
- Toggle on the tabs you want the AI to use. Each gets a number, like
#1. - Tell the AI in plain language: "On tab 1, summarize the page."
That is it. The AI only ever sees the tabs you shared. See Sharing tabs for the details, and Use cases for ideas.
Troubleshooting
- Popup says Offline. Your AI client (and its monkbrowse server) is not running yet. Start it; the extension reconnects on its own.
- The AI says it has no tabs. Nothing is shared. Open the popup and toggle a tab on.
- Running two Chrome profiles. Give the second one its own port in the popup. See Connections & profiles.